Implement google cloud functions with Firebase
I've been playing with Google Cloud Functions for a couple of weeks and actually host one working business web application on the Firebase. While I found gcloud functions easy to write and deploy, there is still no clean and short tutorial on how you can create and start using cloud functions. Below is a short tutorial with some upcoming issues and fixes.
-
Create a new project in google cloud.
Go to google cloud platform console and create a new project. You don't need to setup bucket or change any settings to start using cloud functions. But you need google project to set as a default project when you will initialize Firebase.
-
Setup firebase
Login to firebase. Go to firebase console, import your google project.
-
Install firebase locally
Install firebase package in the root folder of your application. Run in console
$ npm install firebaseNote if you need Firebase Storage you have to install gcloud Node.js client separatly
$ npm install --save gcloud -
Init gcloud functions on the local machine.
Run
firebse init functionsin console from root project directory. Firebase will provide you with a list of your google projects and will ask you to select the default project for the current directory. Select one of the existing project or create one. On the next step allow to set up all dependencies. After this installation on your project directory, you will see new folder 'functions', firebase.json file and .firebaserc file with your default project settings.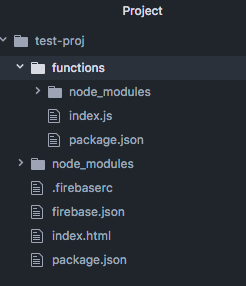
-
Edit firebase.json
Define a path to the index.html (or any other main page of your project). Usually, it is 'public' folder or root directory. Add
"hosting": { "public": "name of your folder with index.html" } -
Create functions
Write functions inside newly created functions/index.js file.
-
Run firebase deploy from local console
$ firebase deploy //to deploy client code and cloud functions on FirebaseUsusally it will take several seconds and depends on how many functions do you have.
After you deploy, the Firebase CLI outputs the URL for any HTTP function endpoints. In your terminal, you should see a line like the following:
Function URL (sayHello): https://us-central1-MY_PROJECT.cloudfunctions.net/sayHello -
Solve 'cors' problems
When you will try to call the newly created function from the client side, you will probably receive the following error:
No 'Access-Control-Allow-Origin' header is present on the requested resource.When your web browser is calling a web service that is in a different domain (in our case https://us-central1-cloud-functions ), it doesn’t make a GET or POST HTTP request right away, it rather starts with making an OPTIONS request, and compares the value of Access-Control-Allow-Origin header in the result with the current domain. When the header value matches the host, the browser goes on and the actual call is being made. Otherwise, the action is stopped and the error similar to the one above is thrown. The mechanism is called Cross-Origin Resource Sharing (CORS).
To solve this, you can use CORS package. Install it inside 'functions' folder (it has its own package.json and node_modules)
 $ cd functions
 $ npm install cors
And wrap you function with cors():
const functions = require('firebase-functions'); const cors = require('cors')({ origin: true }); exports.sayHello = functions.https.onRequest((request, response) => { cors(request, response, () => { response.send("Hello " + request.body.name); }); }); -
Update functions
$ firebase deploy --only functions // to quickly deploy/update only functions codeAfter deploying and executing functions, you can view logs in the Firebase console for Cloud Functions. Here you can find a lot of usefull information: when the functions was called, execution time and status of the execution.